 Snapback5 min read
Organize Mac Windows for Software Development
A practical guide to organizing your Mac windows for software development: IDE placement, terminal positioning, multi-monitor setups, and more.
The Problem with Dev Setups
Every developer has a preferred window arrangement. IDE on one side, terminal on the other, browser for docs, maybe a database client or API tool somewhere. You spend ten minutes getting everything right, then a meeting notification pulls you away. When you come back, the layout is scrambled.
This guide covers how to organize your Mac windows for development and, more importantly, how to make that layout persistent so you never rebuild it.
Single Monitor Layouts
If you work on a single display, here are three arrangements that work well.
The Classic Split
Put your IDE on the left two-thirds and your terminal on the right third. Browser goes full-width on a separate macOS Space.
┌───────────────────────┬──────────┐
│                       │          │
│       IDE / Editor    │ Terminal │
│                       │          │
└───────────────────────┴──────────┘
This works because your code gets the most screen real estate, and your terminal is always visible for running commands, checking logs, or watching test output.
The Vertical Stack
If you have a tall monitor or use your display in portrait mode, stack your windows vertically:
┌──────────────────────────────────┐
│          IDE / Editor            │
├──────────────────────────────────┤
│     Terminal / Logs              │
├──────────────────────────────────┤
│     Browser / Docs               │
└──────────────────────────────────┘
The Focus Mode
When you need to concentrate on code, go minimal:
┌──────────────────────────────────┐
│                                  │
│          IDE (full screen)       │
│                                  │
└──────────────────────────────────┘
Hide everything else. Use a keyboard shortcut to bring up the terminal when needed, then hide it again. Most IDEs have integrated terminals that make this even simpler.
Multi-Monitor Layouts
Two or more displays give you room to separate concerns. Here is how I arrange mine.
Two Monitors: Code and Context
Put your active work on the primary display and your reference material on the secondary:
Primary display:
- IDE or code editor (left two-thirds)
- Terminal (right third)
Secondary display:
- Browser with documentation, Stack Overflow, or PR reviews
- Slack or Discord (muted, checked periodically)
- Database client or API tool
Three Monitors: Full Command Center
If you have three displays, you can dedicate each to a specific function:
Left display: Communication and reference (browser, Slack, email) Center display: Primary work (IDE, terminal) Right display: Output and monitoring (running app, logs, database)
Laptop Plus External Display
This is the most common setup and the most frustrating. When you dock your laptop, you have two screens. When you undock, you are back to one. Your layout needs to work in both scenarios.
When docked, use the external as your primary display and the laptop screen for secondary tasks. When undocked, your primary work should remain accessible on the built-in display.
Apps Every Developer Needs in Their Layout
Here is a typical development stack and where each app belongs:
| App | Role | Position |
|---|---|---|
| VS Code / IDE | Primary editor | Primary display, largest area |
| Terminal (iTerm2, Warp) | Commands, logs | Primary display, side panel |
| Browser (Arc, Chrome) | Docs, PRs, testing | Secondary display |
| Slack / Discord | Communication | Secondary display, corner |
| Database client | Query, inspect | Secondary display or tab |
| API tool (Postman, Insomnia) | Test endpoints | On demand |
| Docker Desktop | Container management | Menu bar only |
| Git client (Fork, Tower) | Version control | On demand |
The key is deciding which apps are always visible and which are on-demand. Always-visible apps get dedicated positions. On-demand apps get opened when needed and closed when done.
Making Your Layout Stick
Here is the part most guides skip. You can spend hours perfecting your window layout, but it only matters if you can get it back instantly.
Save Your Dev Workspace
With Snapback, you can save your entire development setup as a named workspace. Arrange every window exactly how you want it, then save it as "Dev" with a keyboard shortcut.
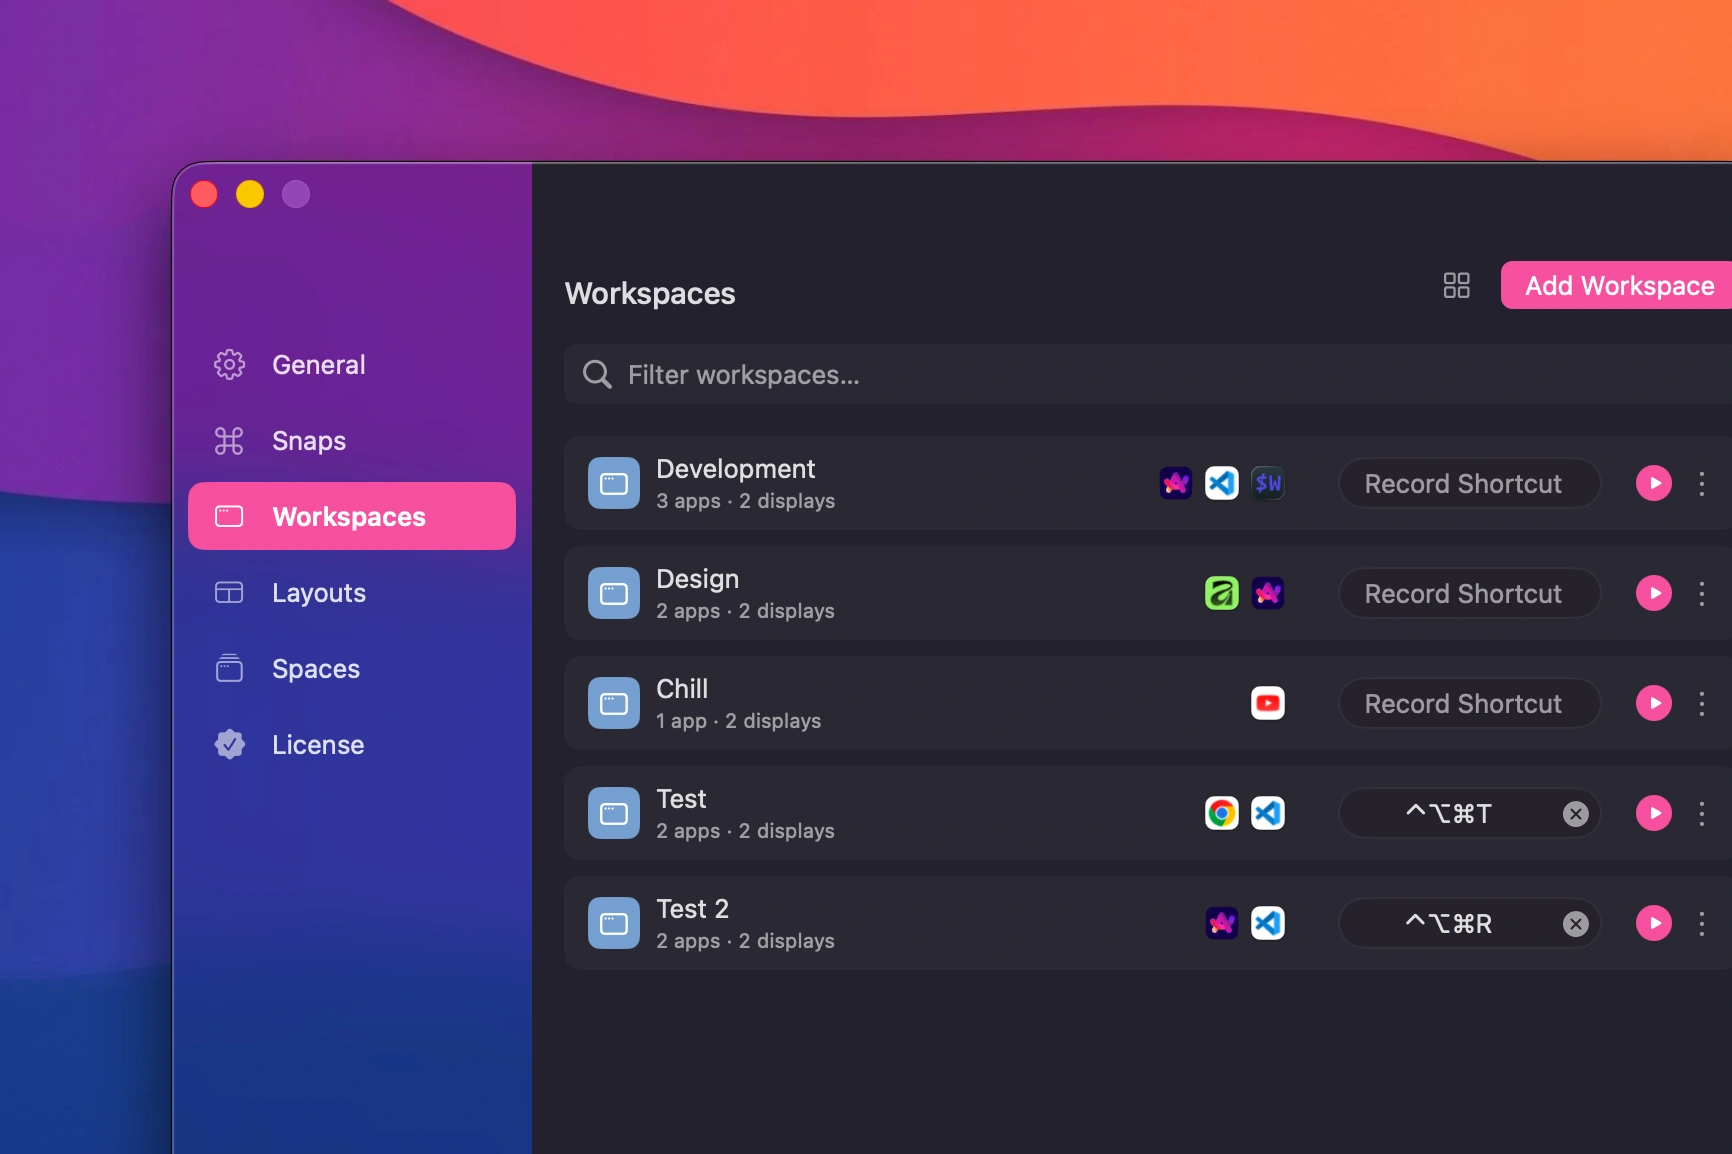 Saved workspaces with multiple configurations
Next time you need your dev setup, hit that shortcut. Every app reopens. Every window goes to its saved position. Every display assignment is respected.
Create Multiple Workspaces
You probably have more than one work context:
- Dev: IDE, terminal, browser, database client
- Meeting: Zoom or Meet, notes app, calendar
- Design: Figma, browser, color picker
- Writing: Text editor, research browser, distraction-free
Save each as a separate workspace. Switch between them with a keystroke.
Handle Monitor Changes
If you dock and undock your laptop regularly, your layout needs to adapt. When you disconnect a monitor, windows assigned to that display should wait. When you reconnect, they should go back where they belong.
Snapback handles this automatically. It remembers which display each window belongs to and adjusts when displays change. Read more about multi-display behavior in the help docs, or see the full guide to managing multiple monitors on Mac.
Keyboard Shortcuts That Speed Up Your Workflow
Beyond workspace switching, a few shortcuts make daily development faster:
Snap to left half: Put your IDE in the left half instantly. Snap to right third: Terminal gets the right third. Maximize: Full screen for focused coding sessions. Move to next display: Push a window to your other monitor.
All of these are available in Snapback with customizable shortcuts. See the complete Mac window snapping shortcuts guide for the full list.
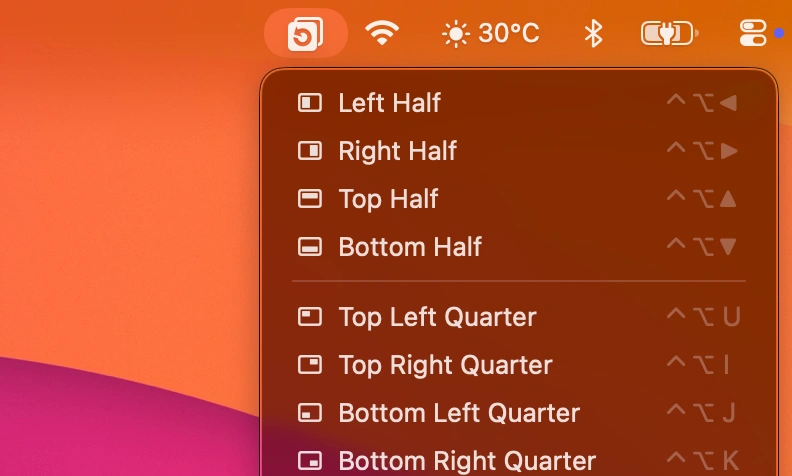 Snapback menu bar interface
The 60-Second Setup
Here is how to set up a persistent dev workspace in under a minute:
- Open every app you need for development
- Arrange them into your preferred layout using window snapping
- Open Snapback from the menu bar
- Click "New Workspace" and name it "Dev"
- Assign a keyboard shortcut
Done. Hit that shortcut anytime to restore your entire development environment.
Download Snapback from the homepage or check the Help Center for detailed setup instructions.
- macOS
- productivity
- software development
- workspace
- multi-monitor
- IDE